

Hello there and happy Monday! Anybody longing for a weekend do-over? I’m actually loving Monday this week because it means it’s the week that my lovely cousin Jamie gets married! She will be a beautiful bride and her wedding will be amazing, no doubt. I helped her with some fun DIY’s for her reception… I can’t wait to see them in action!
Helping Jamie with her wedding made me a wee bit jealous, I’m not gonna lie. Not because I want to get married again (I’ll keep Ryan around 😉 ), but because I sooo wish I had my Cricut when I got married! I did a ton of DIYs for my wedding. The week of the wedding I frantically called in reinforcements because my projects were really too ambitious. It was so important to me to have a wedding that reflected our personalities and that people would leave our wedding/reception saying “that was so them!”
I think we did a pretty good job with personalizing our wedding, but dang! I would have been so much more budget-friendly, elegant, easy, and even more personalized if I had my Cricut then.
Well I don’t have to be jealous now, because I am partnering with Cricut as a part of their “It’s your story, make it personal” campaign to make some of the things that I would have made for my wedding if I had my Cricut then. (But I AM super jealous of the ahhmazing giveaways that Cricut has going this month, more on that later!)
One of the things that I ended up recruiting helpers for at the last minute was my wedding guest gift bags for the hotel rooms. They were kind of last minute and honestly I ran out of time to make them exactly how I wanted them. Well now I get a gift bag do-over!
Wedding Guest Gifts Bags & Essentials (contains affiliate links)
For all of the projects in these wedding guest gift bags (as well as for the gift bags themselves) I used the Cricut Explore Air, standard grip mat, Weeder Tool, transfer tape and a scoring stylus. Whether you make one of all of these ideas, your wedding guest gift bags will provide a warm welcome to your wedding guests and they will know they’re in for a good time at the wedding later!
DIY Wedding Guest Gift Bags
Supplies
- Cardstock in color of your choice
- Ohio (or whatever your state may be) cut file in Cricut Design Space
- Adhesive Foil (I used Stainless Gold and Stainless Teal which have been discontinued but the metallic adhesive foil vinyl style is beautiful as well)
- Scrapbook adhesive runner
- Adhesive foam mounts (optional)
- Thick ribbon
Directions
Open Ohio cut file in and download to your computer and upload into a new project in Cricut Design Space. Add lettering in font of your choice (the font I used is Bromello).

Set the dial on the Cricut to Light Cardstock and cut out state shape (or whatever shape you’d like on the front of the gift bag) out of the cardstock of your choice.

For the 2nd mat, set the dial to “Custom” and select Adhesive Foil from the dropdown menu.

Cut “welcome” out of adhesive foil; weed negative space with weeder tool.

Cut transfer tape to size of the welcome piece, remove transfer tape backing and press onto “welcome”. I like to use the scoring stylus to rub the letters under the transfer tape; this will help them to adhere to the tape when you lift it. Peel adhesive foil backing away from transfer tape and letters.

Position where you’d like the “welcome” to go and lay down transfer tape. Use the scoring stylus to gently rub the letters so that they adhere to the cardstock. Slowly peel transfer tape away from cardstock and letters.

Fold thick ribbon over top edge and bottom of bag, securing with scrapbook adhesive.
Apply adhesive foam mounts on the state shape and gently press onto front of bag. If you don’t want the shape raised, you can simply adhere it with the scrapbook adhesive.


DIY Hotel Room Door Hanger
Supplies
- Door hanger template
- Printer
- Cardstock
- Adhesive foil vinyl
- Glitter cardstock (optional)
- Scrapbook Adhesive Runner
- Cricut Design Space App for iPhone or Android
Directions
Open the door hanger template in Design Space.

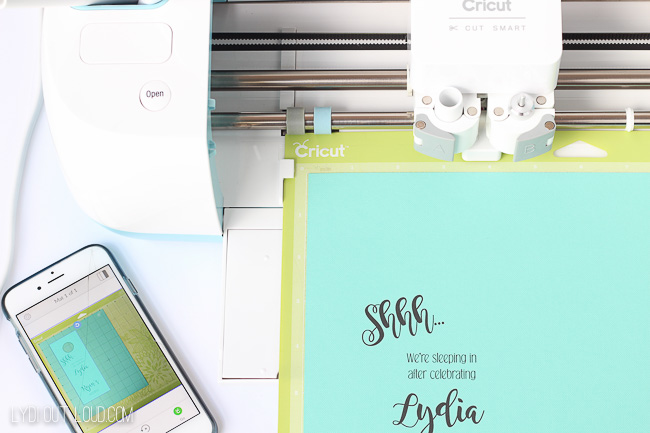
Ok guys, ready for some magic? Have you used SnapMat yet? It takes the guess work out of where exactly (and I mean exactly!) where the Cricut will cut, because you can line it up exactly how you want it yourself. Best.Feature.Ever.
After printing the door hanger, position the printed cardstock on the cutting mat.

Pull up the door hanger template you created in the Design Space App (if you saved it on your desktop it will show up in your projects on the app if you’re signed into your Cricut account) and tap “Send to Mat” and on the next screen tap “SnapMat”.


You will see a frame in which you will position your cutting mat with the printed cardstock. Once it’s positioned properly in the frame, the app will automatically capture the image.


You will see your cutting mat with the hanger template and your printed cardstock so that you can position the door hanger so that it cuts perfectly around the sign text.

Tap “Go” (make sure you set the dial to light cardstock first) and it will get to cutting! (You will have to make sure your Cricut Explore Air and iOs device are paired before you can use this feature). Carefully remove the door hanger from mat.
Turn the Cricut dial to “Custom” and select Adhesive Foil; cut the ampersand and eye lashes; weed negative space. Apply ampersand and lashes to door hanger with transfer tape.
I had some beautiful glitter cardstock that I used for an envelope (more on that later) so I decided to add some behind the door hanger for a little more durability. Who am I kidding and added it because GLITTER! I cut it to size and attached to the back of the door hanger with scrapbook adhesive.

DIY Luggage Tag Favors
Supplies
- Luggage tag template
- Clear Luggage tag
- Adhesive foil
- Transfer tape
Directions
Pull up luggage tag template in design space. Set the dial to “Custom” and select Adhesive Foil from the dropdown menu. Cut mat 1, followed by mat 2 (if using different materials like I did). Weed negative space.
Apply the luggage tag words and heart to the back of the address tag with transfer tape.

DIY Thank You Card & Envelope
Supplies
- Card/Envelope template
- Cardstock
- Contrasting color glitter cardstock
- Acetate paper (optional envelope liner) – I got this one at Michael’s
Directions
Open card/envelope template in Design Space. Because of the size, the Thank You card and envelope will print on 2 different mats. Start with mat #2, the Thank You card. Turn Cricut dial to Light Cardstock, insert scoring stylus into the chamber left of the blade and cut.

Remove the cardstock and weed negative space. Attach glitter cardstock to inside of thank you card so that it shows through the “Thank you”.


Mat #1 is the envelope, set the dial to Cardstock + if using heavy glitter cardstock and cut. I also decided to make an envelope liner out of Acetate, if you’d like to make one, turn the dial to Cardboard and re-cut mat #1. Cut off sides and bottom of envelope liner and attach to envelope with scrapbook adhesive. Fold edges of envelope and secure with scrapbook adhesive.


DIY Monogram Water Bottle Labels
Supplies
- Monogram (you can use this template and just change the letters if you like my font)
- White adhesive vinyl
- Adhesive foil
Directions
Cut white adhesive vinyl into 2½” x 7″ strips .
Turn the Cricut dial to “Custom” and select Adhesive Foil. Cut out a monogram or whatever you’d like on your water bottle labels out of adhesive foil; weed negative space.
Attach monogram or initials onto white vinyl with transfer tape and attach vinyl strips onto water bottles.

So I got a little carried away and also made labels for a pack of pocket tissues and monogrammed a tin of mints and favor boxes. It was just so easy! #MonogramAllTheThings!

You can find pretty much everything for wedding guest gift bags at the dollar store. We added snacks, Shout wipes, hand sanitizer, mints, pain reliever, makeup wipes, lint rollers, etc. Another personal touch, the favor boxes had Buckeyes in them. Get it? Ohio… Buckeyes… And just yum.

What would you make for wedding guest gift bags?
Whether you, a friend or family member is getting married, or you just like to look at pretty things, there is so much wedding eye candy on the Cricut Wedding Page.
Thank you, Cricut, for sponsoring this post and giving me a do-over on my wedding guest gift bags.


Nikki says
Searching for welcome bag ideas for my destination wedding- and this popped up. these are perfect. I am not this talented though.
Kim says
I’m interested in having you make some bags for me and personalize some items. My sons wedding is Feb 17. Is this possible?
Lydia says
Hi Kim, congrats on your son’s wedding! I’ll email you for info. Have a great weekend!
Eileen says
. These would make great party favors for any themed party.
I want a cricut. Wow I am so impressed
Lydia says
That’s a great idea Eileen! You will LOVE your Cricut, I’d love to see what you make for your first project! 😉
Maria says
What a FUN post! Great ideas! Love the Ohio welcome bag!!!!
Lydia says
Thanks so much Maria! It was so fun to make! 🙂
Pam says
Very cool!! So handy to do all those neat decorations yourself!
Lydia says
Thanks Pam! Yes it makes it SO handy!