
DIY Christmas Aprons (plus Kiddie Chef's Hat!)
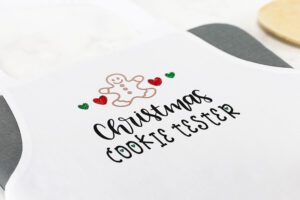
Make these Mommy & Me DIY Christmas Aprons with a Cricut machine and Iron-on. They're the perfect gift for a Christmas cookie baker and his or her favorite little Christmas cookie tester! There's even an over-the-top adorable kids chef's hat design!
Servings: 1 apron
Cost: $20
Ingredients
- Cricut Explore Air 2 or Cricut Maker
- Christmas Apron Cut File
- Adult Aprons
- Everyday Iron-on Black and Beige
- Glitter Iron-on Kelly (Green) and Red
- EasyPress 2
- EasyPress Mat
- Weeder tool
- Kids Apron and Chef Hat
- EasyPress Mini Optional, but ideal if you're doing the Kiddie Chef Hat!
Instructions
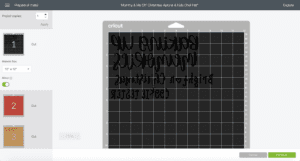
- Open the Christmas Aprons cut file and make any customizations you'd like. Click "Make it". Remember to mirror your image! To cut the Everyday Iron-on layers, turn the knob to the notch just past Iron-on. To cut the Glitter Iron-on, turn the knob to Light Cardstock. I find unless I have a brand new blade, I have the easiest time weeding iron-on with these settings.
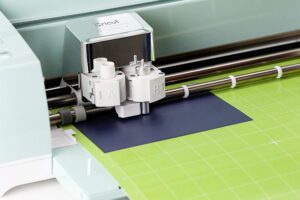
- For each layer you cut, place the liner side down (the shiny side) onto a standard grip cutting mat, load into the Explore Air 2 and cut.
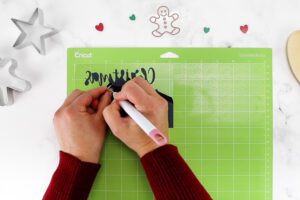
- Unload the mat from the machine. Peel away the material from the negative space around the designs and weed material inside of letters.
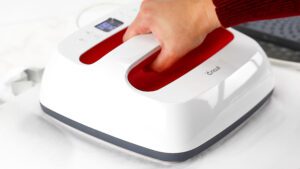
- If using a 100% cotton apron, set the EasyPress to 330° F. Preheat the area that you will apply your design for 5 seconds. Position each element of the design with the liner side up on the apron (the text should be forwards now). Apply the Cover with a piece of parchment or a press cloth. Press for 30 seconds. Remove EasyPress and parchment paper.*See notes for if you're unfamiliar with ironing-on multiple elements of a design.
- Allow to cool completely before peeling away liner. If the design starts to lift as you pull back the liner, press for another 10 - 15 seconds. Flip over and press the back of the apron where the design was applied for 15 seconds.
Notes
- The instructions are written for the aprons, but they are the same for the rim of the kids' chef's hat.
- If using a polyester apron or any other material other than cotton, follow the EasyPress Heat Guide for press time and temperature based on the type of iron-on used and the project material.
- If you're able to cut around each element so that you can press the entire design with 1 pass of the EasyPress, great. If not, make sure to keep the liners so that each element is covered with a liner when you apply the subsequent elements of the design.