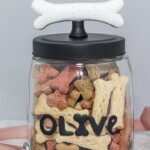
DIY Dog Treat Jar with Granite Sculpey Clay
Learn how to create an easy DIY dog treat jar with Sculpey Premo Polymer Clay. The white granite dog bone turns a boring jar into glam dog bone storage that will decorate any countertop!
Servings: 1 clay bone for jar topper
Ingredients
- 1 package Sculpey Premo in White Granite
- Clay Conditioning Machine
- Clay Roller
- Polymer Clay Knife Tool
- Wood Modeling Tool
- Sculpey Oven-Safe Work Mat
- Large airtight jar
- Industrial Strength Adhesive
- Liquid Sculpey Black (optional)
Instructions
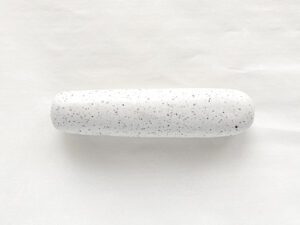
- Condition Sculpey Premo and roll into a cylinder shape about the size of a hot dog.
- Use the knife tool to cut a small slit down the middle on each end.
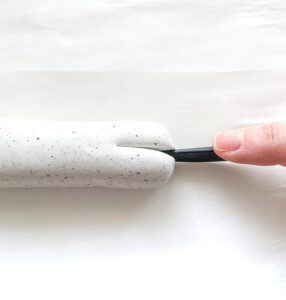
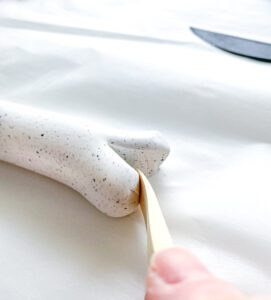
- Split the cut sections and pull them apart to create the ends of the dog bone.
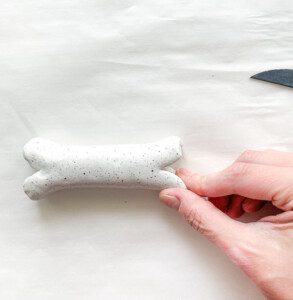
- Use the wood modeling tool to create a rounded shape on the 4 ends of the dog bone. Squeeze the middle portion of the dog bone in a bit so that the ends of the dog bone are more pronounced.
- Transfer your clay dog bone to an oven-safe work mat, place onto a baking sheet and bake at 275° F for 30 minutes per 1/4" of clay thickness.
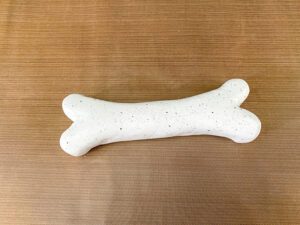
- Remove the bone from the oven and allow to cool fully before attaching it to the dog treat storage container.
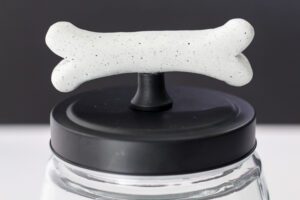
- Use industrial strength adhesive to adhere the clay dog bone it to the handle of the dog treat jar. Press firmly for about 1 minute and allow to dry for at least 24 hours before handling.
How to Personalize Dog Treat Jar with Liquid Sculpey
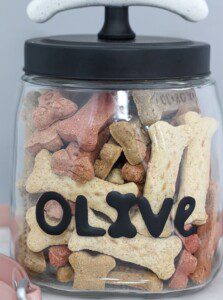
- Clean glass with a dry, lint-free cloth. Using Liquid Sculpey, create the letters for the dog treat container by writing on glass.
- Preheat oven to 275 ° F.
- Clean glass with a dry, lint-free cloth. Apply Liquid Sculpey design onto glass and bake for 15 minutes. Allow to cool completely before peeling the cling away from the glass. Place glass clings onto dog jar to customize it.
Notes
When baking Sculpey Premo, use an oven thermometer to ensure that your oven temperature is indeed 275°. Oven temperatures can widely vary.
When working with Liquid Sculpey, make sure the oven is already preheated to 275o F. and ready to go when your design is ready to hit the oven. Some spreading of the Liquid Sculpey is natural but the longer it sits out the more it will spread.