
How to Make Buffalo Check Christmas Throw Pillow with Cricut Infusible Ink
Cost: $23.00
Ingredients
- Cricut Maker or Cricut Explore Air 2
- Tree trio cut file
- Infusible Ink Transfer Sheet
- White Pillow Cover Infusible Ink Blank
- 12" x10" EasyPress 2
- 20" x 16" EasyPress Mat
- Lint roller
- White cardstock
- Butcher paper (included in infusible ink transfer sheet box)
- Heat resistant tape
Instructions
- In Design Space, open the triple tree cut file and adjust the size if you'd like. Click Make it and mirror the image.
- On the Cricut Maker, choose browse all materials from the drop down menu and select Infusible Ink Transfer Sheet. If you're using a Cricut Explore model, turn the Smart Dial to Custom and select Infusible Ink in Design Space.

- Place the Infusible Ink transfer sheet onto the cutting mat liner (shiny, non-patterned) side down. Load the mat into machine and press the flashing GO button.
- Remove the cut design from the mat and trim away unused area of sheet. Gently roll the cut design so the cut lines separate and are more visible. “Cracking” the cut like this makes it easier to grasp and remove excess paper from in and around your design. Make sure your hands are completely dry before weeding. Use tweezers or your fingers to carefully weed negative pieces from in and around your design, leaving the design on the liner. Trim the clear liner so that it does not extend beyond Cricut EasyPress heat plate.
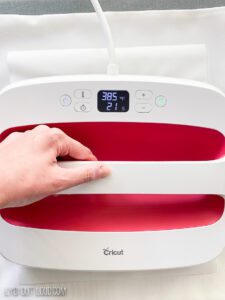
- Set your EasyPress to 385º F. The EasyPress 2 12" x 10" is the perfect size for the pillow cover blanks. You want to make sure the entire design is covered with the EasyPress; you don't want to overlap the heat on an area or the results may look inconsistent.
- Place the pillow cover blank on the Cricut EasyPress mat. Position a sheet of card stock inside the pillow cover where the design will be to protect the pillow case and mat.
- Use a fresh adhesive lint roller and roll the entire surface of the pillow cover. Even the smallest debris or fibers can create imperfections in the Infusible Ink transfer.
- Cover the throw pillow cover with butcher paper and preheat the application area at 385º F for 15 seconds. The butcher paper must be larger than the Cricut EasyPress heat plate (butcher paper comes with the Infusible Ink transfer sheets).

- Place the design face down on the pillow cover with the clear liner on top and cover with butcher paper. You can use heat resistant tape to keep your design in place if you'd like.
- Press at 385º F for 60 seconds with light pressure.
- Slowly lift the EasyPress, remove the butcher paper and remove the liner while still warm.

Notes
If you're new to Cricut Infusible Ink, read this article to ensure your consistent success: https://lydioutloud.com/how-to-use-cricut-infusible-ink/