Fresh Baked Pies Cutting Board Sign
Servings: 1 Cutting Board Sign
Ingredients
- Cutting board (I got this one from IKEA and stained it for better contrast)
- Cricut Maker, Explore Air 2 or Cricut Joy
- Fresh Baked Pies/Gingerbread Image
- Removable Premium Vinyl White
- Transfer Tape
- Scissors, weeder and scraper tools
- Masking tape
Instructions
- Open the cut file for the cutting board and customize the colors and size to your liking.

- Click Make it, then continue. Turn the dial on the Explore Air 2 to the dot in between Vinyl and Iron-on. If using a Cricut Maker, select Premium Vinyl from the dropdown menu.

- Load the vinyl onto a standard grip mat and cut.

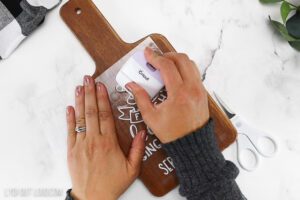
- Remove vinyl from the cutting mat and cut around the design. Using the weeder tool, weed the negative space from the design.

- Cut a piece of transfer tape to the same size as the bake shop sign design. Place the transfer tape over the design and burnish with the scraper tool on top and from behind the design to help the vinyl better adhere to the transfer tape.

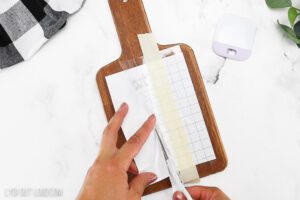
- To avoid any placement or alignment mistakes, measure and position your design onto the cutting board prior to removing vinyl liner from the transfer tape. Place a piece of tape vertically all the way down the center of the design to keep it firmly in place.

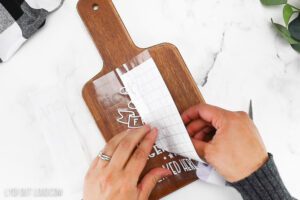
- Peel the liner away from the transfer tape on one side of the design until you reach the taped area. Cut that portion of the liner off with scissors and press the transfer tape onto the cutting board, smoothing down from the inside out.
- Remove the masking tape and gently peel back the remainder of the liner from the transfer tape and smooth the remainder of the design onto the cutting board (again from the inside out).
- Once again, burnish the design onto the cutting board before peeling back the transfer tape. Peel back transfer tape, ensuring that the design remains on the cutting board.