
Hello there and Happy Thanksgiving my friends! I’m so excited to have my super talented friends Jane and Sonja on the blog today sharing an absolutely beautiful project with us. This would be a great project to do this weekend with your family or friends!
Hi friends! Jane and Sonja here from Sustain My Craft Habit, a DIY, craft and home decor blog focussed on creating beautiful things with natural materials. Thank you so much to Lydia for giving us a chance to meet you here at Lydi Out Loud. We are very excited to be sharing this painted pinecone and cork Christmas tree project with you today!

This DIY combines two of our greatest loves: Christmas crafting and using materials from nature.
We are loving the way our little pine cone forest turned out! It’s the first time we’ve used these Extreme Sheen paints and we can’t get enough. With just some paint, these pinecones have been completely transformed into an elegant Christmas decoration. They almost appear to be made of colored glass, don’t they?

If you’re like us and collect your own pinecones, you want be sure they are cleaned before you start crafting. You can check out our tutorial on how to clean pine cones.
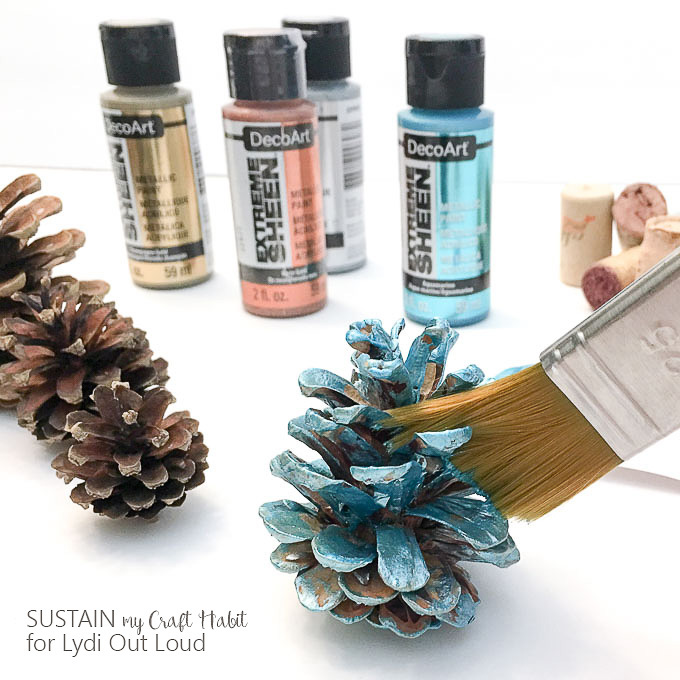
Supplies Needed to make your own painted painted pinecone and cork Christmas tree Decorations:
- Pine cones in an assortment of varieties and sizes
- Americana Decor Extreme Sheen in Turquoise, Silver, Champagne Gold and Rose Gold
- Paint brush, small, flat bristles
- Wine Corks
- Glue Gun and clear hot glue sticks
- Utility knife (optional)

Paint all sides of the pinecone scales in one of the ultra sheen paint colors. Leave it to dry before applying a second coat as needed (we barely used two coats for ours). Paint as many different pinecones and colours as you’d like.
Once the paint is dry, it’s time to attach the cork to the base (aka “tree stump”). To get varying heights, we carefully cut some of the corks in half. For tips on cutting cork, check out our DIY wine cork bath mat tutorial.
Make sure the flattest end of the wine cork is on your table surface. Shave off any bumpy bits if needed for it to sit flat. Next, scoop out a little picket in the top of the cork in which the bottom of the pine cone will sit. This step might not be necessary for pine cones with flat bottoms.

With a hot glue gun, apply a generous glob of clear craft glue into the wine cork pocket.

Hold the pine cone so that it’s standing straight up until the glue cools and sets a bit.

That’s it! Arrange and display your beautiful jewelled pine cone and cork Christmas trees.

They’d be great grouped together for a neutral holiday mantel (see our rustic Christmas mantel from last year). Or wouldn’t they fit right in with Lydia’s own Farmhouse Glam Fall Centerpiece idea?

Be sure to stop by Sustain My Craft Habit! We have lots of nature-inspired goodies there such as free printable Christmas gift tags and printable floral note cards.
Have a wonderful Christmas friends!
SaveSave


Thelma Day says
Beautiful trees. Thanks for sharing.
Lydia says
Thanks for saying hi Thelma, I’m glad you enjoyed them, the ladies did a great job on them! 🙂
Karren Haller says
Hi Lydi, found these cute Christmas tree decorations on Hunt & Host and had to pop over. They are really cute and inspire me to make some, I sure have plenty of the items except the paint.
I have Pinned and would love to have you share on my Oh My Heartsie Girls Wonderful Wednesday, hope you will join us!!
Wishing you happy Holidays!!
Lydia says
Thanks so much Karren! Jane and Sonja did a great job didn’t they?! Happy Holidays to you as well and have a great weekend! xo
Freddy says
Those are super cool!!
Lydia says
They did a great job, didn’t they Freddy?!